As an expert in garage workshop tools and accessories, I am excited to share valuable tips and techniques to ensure your tools are always in top-notch condition. Whether you are a seasoned DIY enthusiast or just starting, proper maintenance and care of your tools is essential for both their longevity and your safety.
Regular maintenance not only extends the lifespan of your tools but also ensures their optimal performance. By following a few simple steps, you can keep your tools in following working conditions and make your DIY projects a breeze. From checking and cleaning your tools to storing them properly, several practices can help you get the most. Several practices caney aspects of tool maintenance is keeping them clean. Dust, dirt, and debris can accumulate on your tools, affecting their performance and potentially causing damage. Regularly wiping down your tools with a clean cloth and using compressed air or a small brush to remove debris will keep them in great shape.
In addition to cleaning, it is essential to inspect your tools for any signs of wear-inspecting parts, worn-out handles, or any other issue is vital that may affect their performance or compromise your safety. Taking the time to address these issues promptly can prevent further damage and ensure that your tools are always ready for your next project.
Importance of Regular Maintenance for DIY Workshop Tools
Regarding your garage workshop, your tools are the backbone of your DIY projects. Without them, your ability to create, build, and repair is severely limited. That’s why it’s essential to prioritize the maintenance and care of your hand tools and accessories. Regularly maintaining your tools prolongs their lifespan and ensures that they perform optimally when you need them most.
Cleaning Tools – A Key Step in Tool Care
Keeping your tools clean is a fundamental aspect of maintenance. By removing dirt, debris, and rust, you prevent any possibility of damage and ensure smooth operation. Regular cleaning also lets you identify any signs of wear or damage requiring immediate attention.
Proper Lubrication Terequiringage Workshop Tools
Lubrication is essential for keeping your tools functioning smoothly. Applying the proper lubricant to moving parts reduces application, prevents premature failure, and reduces the use of the specific lubricant the manufacturer recommends to avoid any potential damage.
Understanding and Sharpening Cutting Tools
Cutting tools, such as saw blades, chisels, and scissors, require regular sharpening to maintain their effectiveness. Dull knives compromise the quality of your work and pose safety risks. Learning the proper techniques for sharpening your tools will ensure you achieve clean cuts and extend their lifespan.
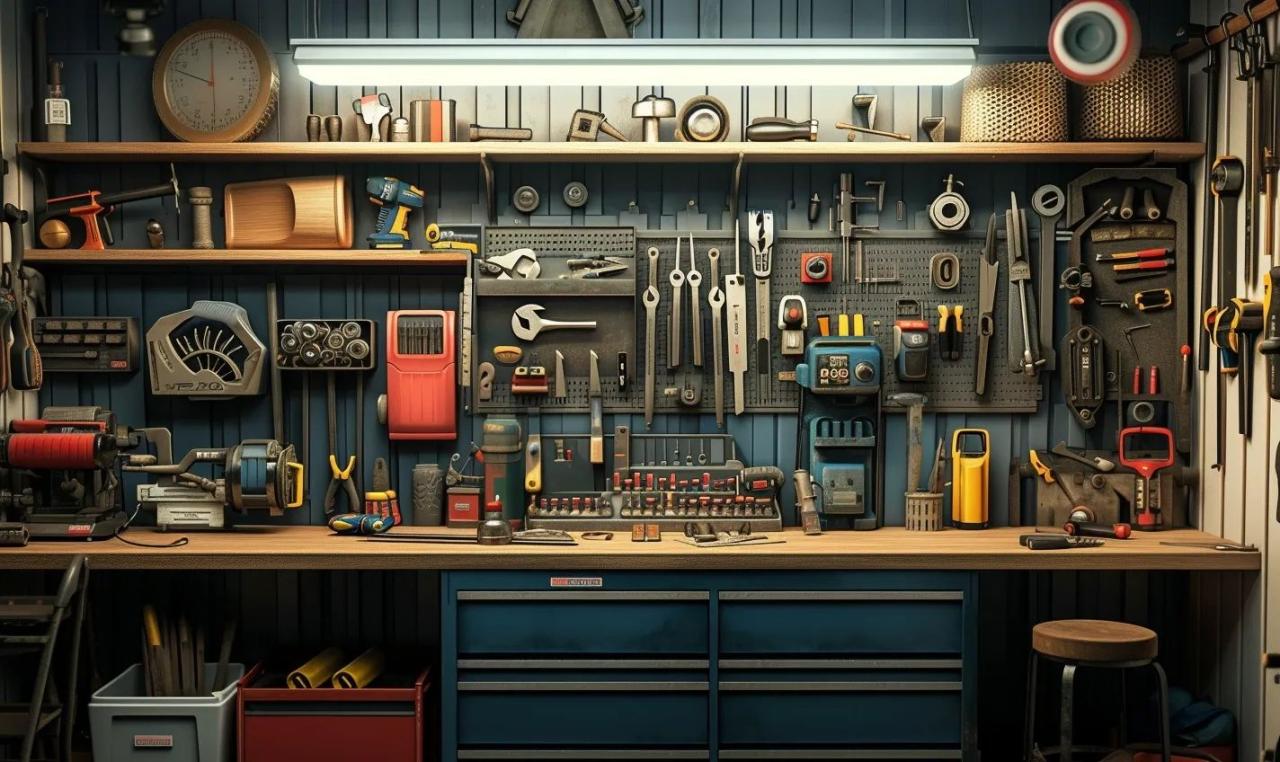
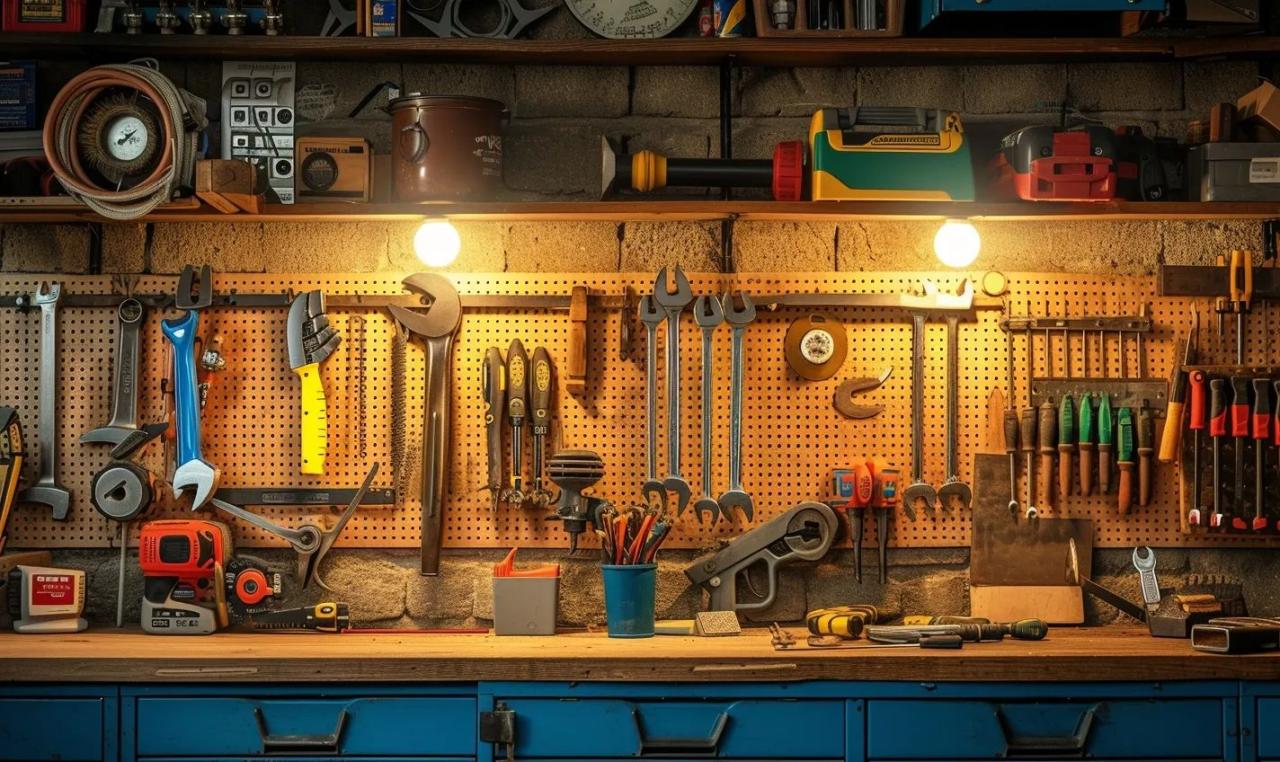
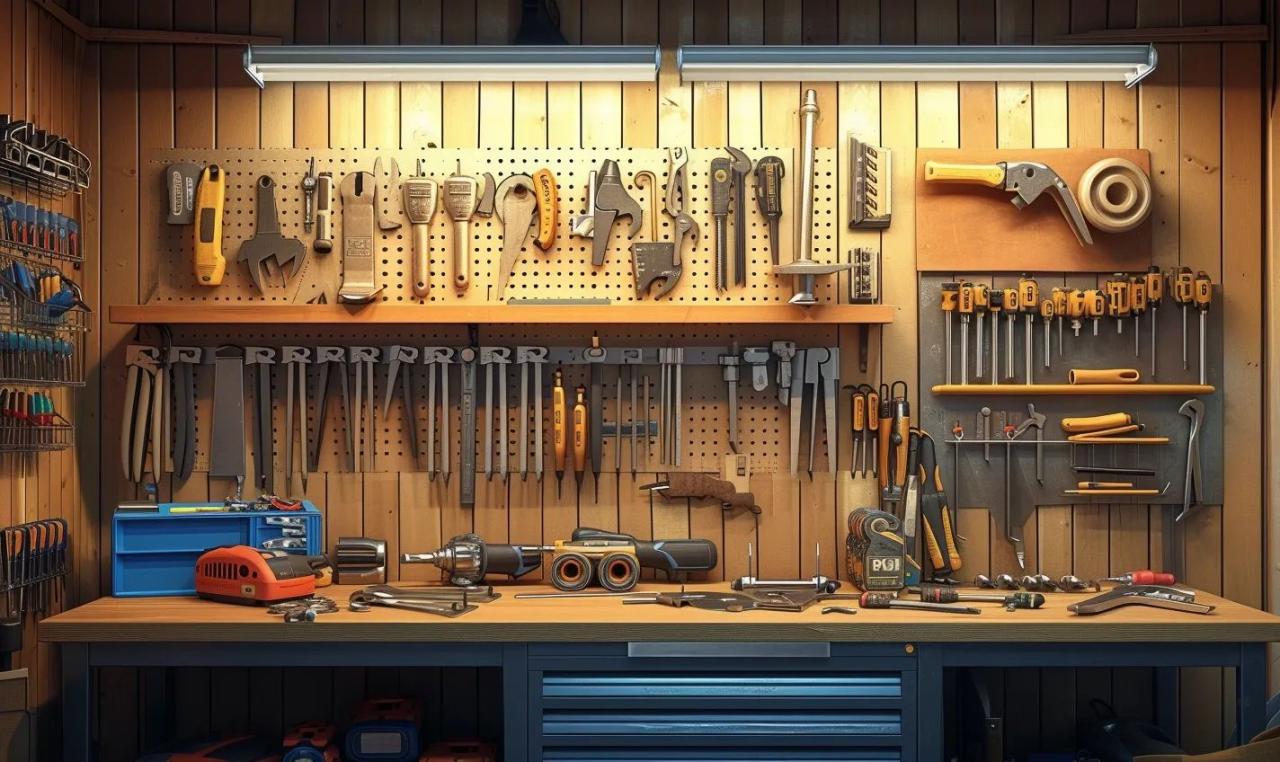
Storage Solutions to Extend the Lifespan of DIY Workshop Tools
The way you store your tools can significantly impact their longevity. Proper storage solutions, such as toolboxes, racks, and pegboards, keep your tools organized and protected from moisture, dust, and accidental damage. By storing your tools correctly, you’ll be able to find them quickly and reduce the risk of losing or misplacing them.
Inspection and Repair: Ensuring Safety and Longevity
Regularly inspecting your tools allows you to identify potential issues before they escalate. From loose handles to cracked casings, catching these problems early can save you from accidents and costly repairs. Additionally, promptly repairing damaged tools ensures they can last for future projects.
Maintaining Power Tools for Optimal Performance
Power tools require extra attention in terms of maintenance. Regularly checking cords, brushes, and batteries and cleaning debris and dust from vents promote dormancy to prevent overheating. Following manufacturer guidelines for maintenance will also protect your warranty and guarantee the safety of your power tools.
By implementing these maintenance practices, you’ll enjoy several benefits:
- Increased tool lifespan
- Improved performance and accuracy
- Enhanced safety during use
- Reduced risk of costly repairs or replacement
- Greater satisfaction with your DIY projects
Spend a few minutes regularly maintaining and caring for your tools, and you’ll be rewarded with reliable, efficient, and long-lasting tools that will support your DIY projects for years to come.
Cleaning Tools: A Key Step in Tool Care
Maintaining a well-equipped garage workshop is essential for any DIY enthusiast. It allows you to take on various projects with ease and confidence. However, remember that your tools are not indestructible and require regular maintenance and care to ensure they remain in optimal working condition. Cleaning your tools regularly is critical in preserving their functionality and extending crucial ton.
Why is cleaning your tools necessary?
Regular cleaning of your DIY workshop tools offers several benefits:
- Prevents corrosion: Tools exposed to moisture and debris can develop rust, weakening their structure and impairing their performance, weakening dirt and moisture and reducing the risk of corrosion.
- Promotes longevity: Removing dust, dirt, and grime from your tools helps prevent wear and tear. Clean tools are less likely to experience premature damage or failure, ensuring they last longer.
- Improves efficiency: Dirty tools can accumulate debris and build up over time, hindering performance. By cleaning your tools regularly, you can maintain their efficiency and get the best results from every use.
How do you clean your tools effectively?
Cleaning your DIY workshop tools doesn’t have to be a daunting task. With the right approach, you can ensure they stay in top-notch condition. Consider the following tips:
- Use appropriate cleaning agents: Different tools may require different cleaning products. Mild soap and water are safe options, but some tools may need specialized cleaning solutions. Read the manufacturer’s instructions or research to determine the best approach.
- Remove start and grease: Use a wire brush or scrubbing pad to remove dirt and grease gently for tough grime. Avoid using excessive force, as it can damage the tool’s surface.
- Dry thoroughly: After cleaning, dry your tools thoroughly to prevent moisture rust. Consider using compressed air or a clean cloth to remove any remaining moisture.
- Apply lubrication: Once your tools are clean and dry, applying a thin layer of lubrication can help prevent rust and keep them running smoothly. Choose a lubricant appropriate for the tool’s specific requirements.
Regular cleaning should be a part of your overall tool maintenance routine. By incorporating this simple step into your garage workshop practices, you can ensure the longevity and performance of your cherished DIY tools for years to come.
Maintaining your DIY workshop tools can be an enjoyable and satisfying endeavor. Taking the time to clean and care for your tools enhances their lifespan and guarantees reliability. So, why not start today? Keep your tools clean, well-maintained, and ready for your next project!
Proper Lubrication Techniques for Garage Workshop Tools
Keep Your Tools Running Smoothly with Regular Lubrication
Adequate lubrication is essential for your garage workshop tools’ longevity and optimal performance. Not only does it prevent wear and tear, but it also reduces friction, minimizes heat buildup, and helps prevent rust and corrosion. With a few simple steps, you can ensure that your tools stay in top shape and ready for any DIY pro
Choose the Right Lubricant for Each Tool
Not all tools require the same type of lubrication. It’s essential to use the appropriate lubricant for each tool to ensure maximum efficacy. Here are some common lubricants and their recommended applications:
- Silicone lubricant: Ideal for reducing friction on metal, plastic, and rubber components.
- Multi-purpose oil: Suitable for general lubrication purposes, such as hinges and joints.
- Lithium grease: Perfect for heavy-duty applications, such as gears and bearings.
Read the manufacturer’s instructions or consult Readif if unsure about the best lubricant for a specific tool.
Tips for Proper Lubrication
Follow these tips to ensure that you lubricate your garage workshop tools correctly:
- Clean the tool: Before applying any lubricant, make sure the tool is clean and free from debris.
- Apply lubricant sparingly: A little goes a long way. Avoid over-lubricating, as it can attract dust and dirt.
- Wipe off excess lubricant: After applying it, wipe off any excess to prevent it from dripping and collecting debris.
- Lubricate moving parts: Focus on lubricating the moving parts, such as hinges, gears, and pivot points.
- Regular maintenance: Incorporate lubrication into your regular tool maintenance routine to keep them in excellent condition.
Understanding and Sharpening Cutting Tools
needed to DIY projects in your garage workshop, having sharp cutting tools is essential for achieving precise and clean cuts. Over time, regular use can cause cutting tools to become dull, making them less effective and potentially dangerous. That’s why understanding how to sharpen your cutting tools is crucial for maintaining their performance and longevity.
The Importance of Sharp Cutting Tools
Sharp cutting tools make your DIY projects more accessible and help you get professional-grade results. Here are reasons why sharp cutting tools are vital:
- Efficiency: Sharp tools require less effort and time to complete tasks, allowing you to work faster and more efficiently.
- Precision: Dull cutting tools can lead to inaccurate cuts, compromising the quality of your work. Sharp tools ensure clean and precise cuts every time.
- Safety: Dull blades can slip and cause accidents. Keeping your cutting tools sharp reduces the risk of injuries and promotes a safer working environment.
- Tool Longevity: Regularly sharpening your cutting tools helps maintain their original shape and reduces the need for more frequent replacements.
Basic Sharpening Techniques
Here are a few techniques to sharpen standard cutting tools:
- Knives and Scissors: Use a sharpening stone or a handheld sharpener to restore the edge of your knives or scissors. Remember to follow the manufacturer’s instructions for the specific tool.
- Chisels and Plane Blades: Utilize a honing guide to achieve the correct bevel angle before sharpening. Start with a coarse-grit sharpening stone and gradually move to finer grits for a polished edge.
- Saw Blades: Invest in a dedicated saw blade sharpening kit or use professional services to ensure accurate results.
Maintaining Sharp Cutting Tools
After sharpening your cutting tools, it’s essential to incorporate proper maintenance practices to prolong their lifespan:
- Regular Cleaning: Remove debris or buildup from the cutting edges to prevent corrosion and maintain peak performance.
- Proper Storage: Store your cutting tools in a dry and clean environment to prevent damage and maintain their sharpness.
- Frequent Inspections: Regularly inspect your cutting tools for signs of wear or damage, such as chips or cracks. Address any issues promptly to prevent further damage.
By understanding how to sharpen and care for your cutting tools properly, you can ensure that they remain in optimal condition for your garage workshop projects. Remember, a sharp tool is a safe and efficient tool!
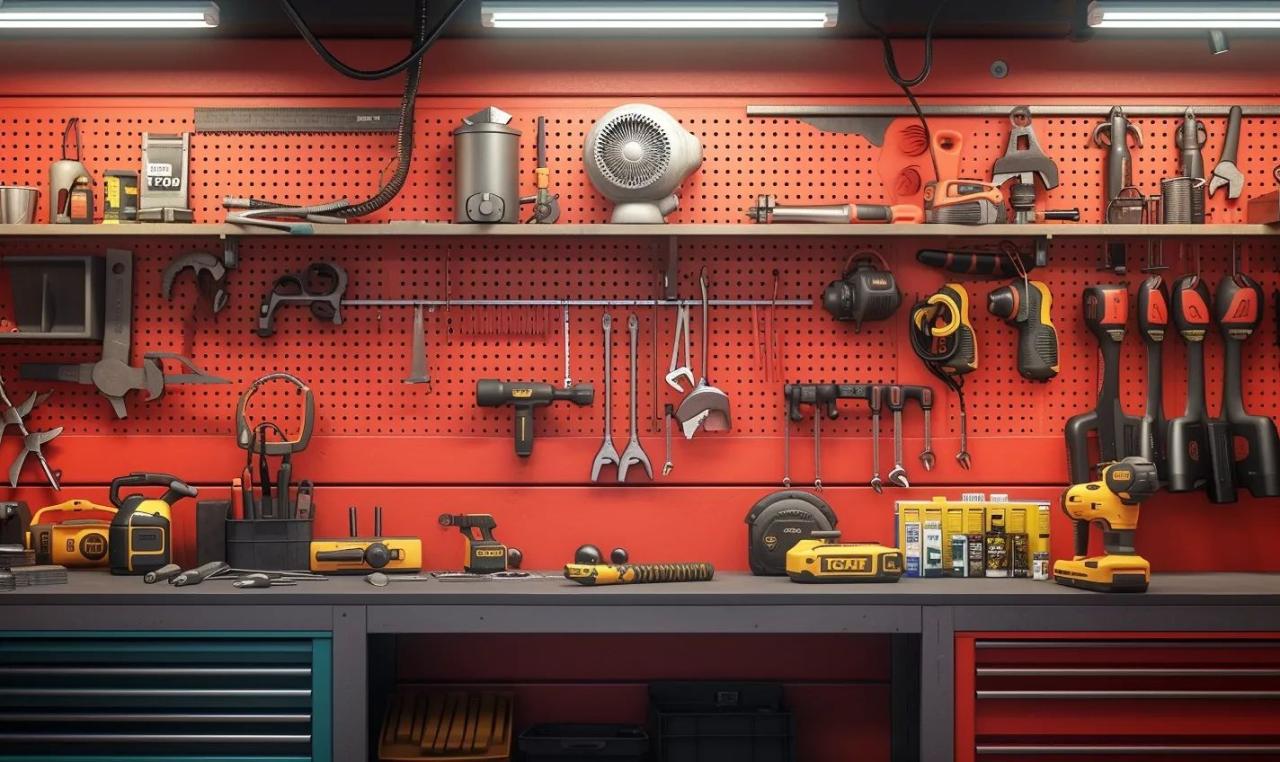
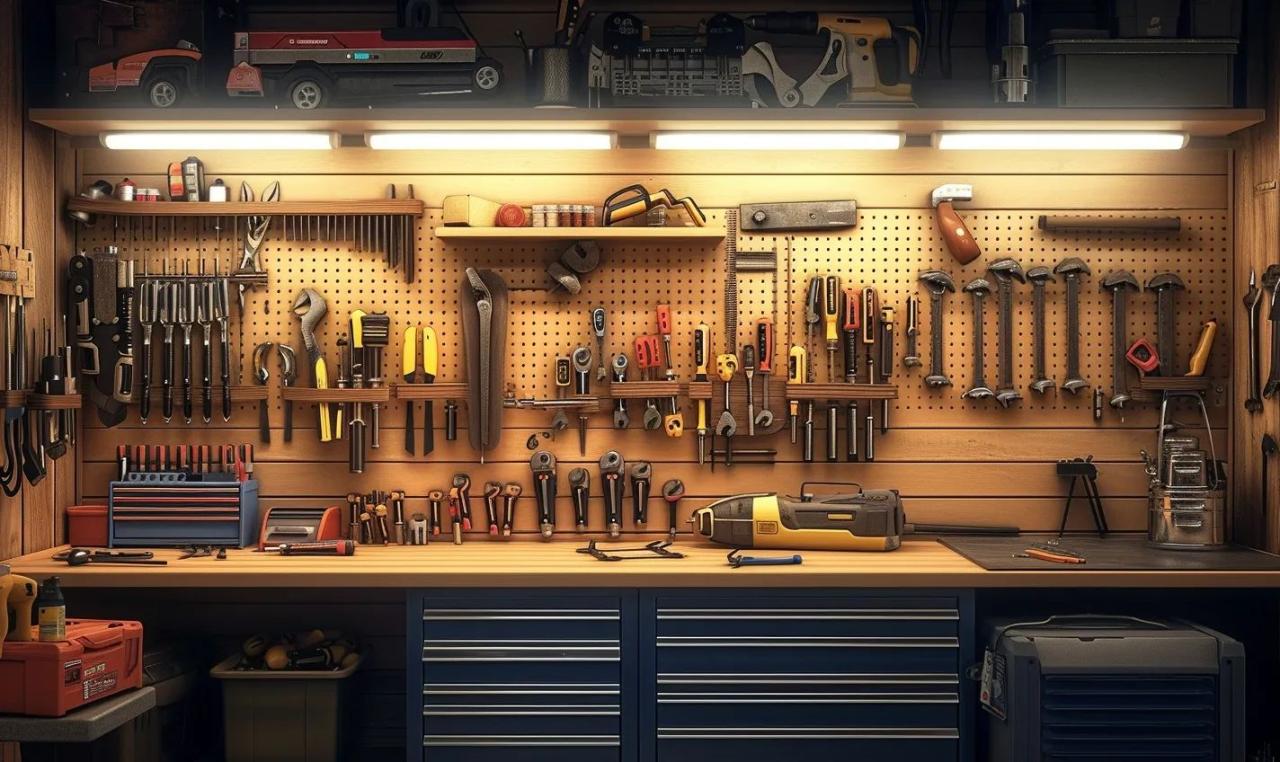
Storage Solutions to Extend the Lifespan of DIY Workshop Tools
Proper storage is essential for maintaining the longevity and performance of your DIY workshop tools. With the appropriate storage solutions, you can protect your tools from damage, corrosion, and wear and tear. Here are some practical tips to help you keep your tools in excellent condition:
Clean and Dry
Before storing your tools, make sure they are clean and dry. Remove dirt, dust, or debris using a soft brush or cloth. For stubborn grime, use a mild detergent and warm water. Dry the tools thoroughly to prevent moisture from causing rust or corrosion.
Organize and Label
Keep your tools organized and easily accessible by using tool storage systems such as toolboxes, pegboards, or wall-mounted racks. Use labels or color-coded stickers to identify each tool’s designated spot. This helps you find the right tool and prevents unnecessary mishandling and damage.
Separate and Secure
Avoid storing different tools together, as they can scratch or damage each other. Sharp tools, such as chisels or saws, separate from other tools and protect their blades. Use toolcases or blade guards to store these items safely. Additionally, secure your power tools by removing batteries or unplugging them to prevent accidental operation.
Climate Control
Extreme temperatures or humidity can affect the performance and lifespan of your tools. If possible, store your tools in a climate-controlled environment. Store them from heat, cold, or excess moisture. Consider using moisture-absorbing packets or dehumidifiers to keep the storage area dry.
Implement Anti-Rust Measures
Rust is the biggest enemy of any tool. To prevent rust formation, apply a thin layer of rust-resistant oil or silicone lubricant on metal surfaces before storing them. Alternatively, you can use rust-inhibiting products or store tools in airtight containers with moisture-absorbing packets.
Regular Inspection
Even when in storage, it’s crucial to regularly inspect your tools for any signs of damage or wear. Check for loose handles, rusty spots, or any malfunctioning parts. Address these issues promptly to prevent further deterioration and ensure the safety of future usage.
By following these simple storage solutions, you can extend the lifespan of your DIY workshop tools, allowing you to enjoy their performance and reliability for years to come. Invest in proper storage systems, take the time to clean and maintain your tools regularly, and provide them with the protection they need. Your tools will thank you with exceptional performance when you need them the most.
Inspection and Repair: Ensuring Safety and Longevity
Regular maintenance is crucial for keeping your DIY workshop tools in top shape. However, even with the most diligent care, tools can still experience wear and tear over time. That’s why inspecting your tools periodically for any signs of essential or malfunction is crucial. By promptly identifying and addressing issues, you can ensure the safety and longevity of your tools.
Taking a Closer Look
Before embarking on any repair work, start by giving your tools a thorough inspection. Here are some key areas to focus on:
- Handles and grips: Check for cracks, splinters, or loose parts. These can affect your grip and increase the risk of accidents.
- Joints and connections: Examine the connections between different parts of your tools. Look out for loose screws, bolts, or pins that need tightening.
- Blades and cutting edges: Inspect sharp tools like saws and chisels for any signs of dullness, chips, or nicks. Damaged blades can compromise the quality of your work and pose a safety hazard.
- Moving parts: Lubricated joints should move smoothly without excessive resistance or grinding noises.
- Electrical components: For power tools, check the power cords, switches, and plugs for any signs of fraying, exposed wires, or other damage. A professional should resolve any electrical issues. A professional should resolve any electrical problems during an inspection; it’s time to take action. Depending on the severity of the situation, you may need to repair or replace certain parts. Here are a few tips to consider:
- Repairing: For minor issues, such as loose screws or bolts, tightening them with the appropriate tool or applying a thread-locking adhesive can often solve the problem. Cracked handles or grips can sometimes be fixed with epoxy or by replacing the damaged part.
- Replacing: If you notice significant damage or wear that cannot be repaired, it’s essential to replace the affected part or tool entirelreplacingfety when it comes to your is a vital member; if you’re unsure how to repair or replace a specific part properly, consult the manufacturer’s instructions or seek guidance from a professional.
By prioritizing regular inspection and repair, you can maintain the safety and longevity of your DIY workshop tools. Remember, a well-maintained tool is safer to use and performs better, allowing you to tackle your projects with confidence and ease.
Next time, we will explore the importance of maintaining power tools for optimal performance.
Maintaining Power Tools for Optimal Performance
Importance of Regular Maintenance for DIY Workshop Tools
Regular maintenance ensures optimal performance and longevity in your DIY workshop toolset. By investing a little time and effort into proper care, you can prevent costly repairs and replacements and avoid accidents caused by malfunctioning equipment. So, let’s explore some essential maintenance tips to keep your power tools in top shape:
Cleaning Tools – A Key Step in Tool Care
Before diving into any maintenance routine, cleaning your power tools thoroughly is crucial. Regular cleaning helps remove debris, dust, and grease that can accumulate over time and affect their performance. Use a soft brush or compressed air to remove loose dirt, and wipe down the surfaces with a cloth dampened in mild soap and water solution. For stubborn grime, a degreaser can come in handy.
Proper Lubrication Techniques for Garage Workshop Tools
Lubrication plays a vital role in keeping your power tools running smoothly. Apply a few drops of lubricating oil to the moving parts, such as the gears, bearings, and pivots. This will help reduce friction and wear and prevent rust and corrosion. Just make sure to use the appropriate lubricant the manufacturer recommends for each specific tool.
Understanding and Sharpening Cutting Tools
If your DIY projects involve cutting tools like saw blades or drill bits, keeping them sharp for precise and efficient cutting is essential. Regularly inspect the sharpness of the blades and edges, and sharpen or replace them as necessary. Dull cutting tools not only compromise the quality of your work but also put additional strain on the power tool, decreasing its overall performance.
Storage Solutions to Extend the Lifespan of DIY Workshop Tools
Proper storage is another critical aspect of tool maintenance. Ensure your power tools are stored clean, dry, and well-ventilated to prevent moisture buildup and rust formation. Consider investing in tool chests, wall-mounted racks, or toolboxes with foam inserts to protect them from accidental impacts and scratches.
Inspection and Repair: Ensuring Safety and Longevity
Regularly inspect your power tools for any signs of damage, loose parts, or worn-out cables. Address these issues promptly to avoid safety hazards and prevent further damage to the tool. If you’re unsure about handling repairs yourself, it’s best to consult a professional technician or contact the manufacturer for guidance.
Following these maintenance tips will extend your power tools’ lifespan and ensure they perform at their best. Remember that taking care of your tools is an investment in the quality of your DIY projects and overall safety. So, please don’t overlook the importance of regular maintenance and give your tools the TLC they deserve.
Rust Prevention: Shielding Your Tools from Corrosion
When it comes to maintaining your DIY tools and accessories, one of the greatest enemies you’ll face is corrosion and rust. These can not only impact the performance of your tools but can also shorten their lifespan. However, with the proper knowledge and preventive measures, you can shield yourself from corrosion and keep them in optimal working condition for years.
Why is rust prevention important?
Rust is formed when metal tools are exposed to moisture and oxygen for extended periods. It affects the appearance of your tools and weakens the structural integrity, making them less effective in performing their tasks. You can save time and money by avoiding tool replacement and repair by implementing rust prevention techniques.
Tips for preventing rust on your tools
To keep your tools corrosion-free, consider incorporating the following practices into your routine maintenance:
- Clean and dry: After each use, clean your tools thoroughly using a mild detergent or rust remover. Dry them thoroughly before storing them to prevent moisture buildup.
- Lubrication: Apply a thin layer of oil or silicone lubricant to the metal surfaces of your tools. This helps create a protective barrier against moisture and corrosion.
- Store properly: Store your tools in a dry, well-ventilated area to avoid exposure to excessive moisture. Use airtight containers, silica gel packets, or toolboxes with rust inhibitor liners for protection.
- Regular inspections: Inspect your tools for any signs of corrosion or damage. Catching early signs of rust allows you to address them promptly and prevent further deterioration.
Additional rust prevention measures
While regular maintenance and care can significantly reduce the risk of rust formation, you can also consider the following additional measures:
- Anti-corrosion sprays: Apply anti-corrosion sprays to your tools as an added layer of protection. These sprays create a barrier against moisture and provide long-lasting rust prevention.
- Desiccant packs: Use desiccant packs or moisture-absorbing products in tool storage areas to keep humidity levels low, reducing the chances of rust formation.
- VCI (Volatile Corrosion Inhibitor) paper: Use VCI paper to wrap your tools before storage. These papers release chemicals that prevent rust and corrosion, protecting your tools.
Implementing these rust prevention techniques and practices ensures your DIY workshop tools’ longevity and optimal performance. Remember, prevention is critical, so prioritize regular maintenance, proper storage, and taking immediate action if you notice any signs of rust or corrosion.
Understanding and Replacing Worn-out Parts
When it comes to tool maintenance and care in your garage workshop, understanding and replacing worn-out parts is crucial. Over time, tools can experience wear and tear, leading to decreased performance and potential safety hazards. You can ensure your DIY tools’ longevity and optimal functionality by identifying worn-out parts and promptly replacing them.
Signs of Worn-out Parts
Recognizing the signs of worn-out parts is the first step towards maintaining your tools effectively. Look out for the following indicators:
- Visible cracks, chips, or splintering on handles or grips
- Blades or cutters that no longer maintain a sharp edge
- Springs that have lost their tension or become loose
- Damaged or frayed cords on power tools
- Corroded or rusted components
If any signs are present, it’s time to take action and replace the worn-out parts.
Replacing Worn-out Parts
Once you have identified the worn-out parts, replacing them promptly is essential. Here are a few steps to guide you through the process:
- Refer to the tool’s manual or manufacturer’s website to identify the needed replacement part.
- Ensure you have the necessary tools to remove the worn-out part safely.
- Carefully remove the old part, noting its position and how it is connected to the tool.
- Replace the worn-out part with the new one, following the manufacturer’s instructions for proper installation.
- Double-check that the replacement part is securely fastened and functioning correctly.
By taking the time to understand and replace worn-out parts, you ensure that your tools continue to perform at their best, enhancing both your safety and the quality of your projects.
Importance of Regular Inspections
Regular inspections are vital to catch any signs of wear before they become significant issues. Make it a habit to inspect your tools after each use, paying close attention to high-stress areas and moving parts. This practice allows you to address any minor issues promptly, preventing them from escalating and causing further damage.
Additionally, consider scheduling routine maintenance intervals for your tools. This approach helps you stay on track with inspections and ensures your tools receive the necessary care to perform optimally. Remember, prevention is always better than cure regarding tool maintenance.
Understanding and replacing worn-out parts is integral to DIY tool maintenance and care. By staying vigilant and proactive, you can extend the lifespan of your tools while enhancing their performance and your overall workshop experience.
Essential Safety Measures for Tool Maintenance and Care
Safety should always be your top priority when maintaining and caring for your DIY workshop tools. Not only does proper tool maintenance ensure optimal performance, but it also helps prevent garage accidents and injuries. You can keep your tools in excellent condition and protect yourself while working by following essential safety measures. Here are some essential safety tips to keep in mind:
Wear Protective Gear:
Before you start any maintenance tasks, wear the necessary protective gear. Safety glasses, gloves, and hearing protection can shield you from hazards such as flying debris, chemicals, and loud noises.
Disconnect Power Sources:
Before performing any maintenance or cleaning on power tools, always disconnect them from their power sources. Unplugging power cords and removing batteries will eliminate the risk of accidental starts and electrocution.
Handle Tools with Care:
When handling tools, be sure to do so with caution. Never carry sharp or pointed tools with the blades facing upwards, and always use a firm and secure grip. Keep your fingers away from moving parts and blades to avoid accidental cuts or amputations.
Follow the Manufacturer’s Instructions:
Each tool may have specific instructions for maintenance and care provided by the manufacturer. Take the time to read these guidelines thoroughly and follow them diligently. This will ensure you follow the appropriate techniques and use the correct maintenance tools.
Store Tools Properly:
After using your tools, store them in a safe and organized manner. Use proper containers, racks, or toolboxes to prevent accidents caused by tripping over stray tools. Also, keep tools out of reach of children to avoid potential injuries.
Use the Right Tools for the Job:
Ensure you use the right tools when maintaining and caring for your tools. Using improper tools can damage both the tool itself and your safety. Always use the appropriate cleaning brushes, lubrication tools, and sharpening instruments for each type of tool.
By implementing these essential safety measures, you can ensure that the maintenance and care of your DIY workshop tools are conducted safely. Remember, taking the time to properly maintain your tools not only enhances their longevity but also ensures your well-being while working in your garage.
Common Mistakes to Avoid in DIY Tool Care
Proper care and maintenance of your DIY tools are essential to keep them in optimal working condition and extend their lifespan. However, there are some common mistakes that many people make when it comes to tool care. By avoiding these errors, you can ensure that your tools remain in top shape and continue to serve you well.
Neglecting regular cleaning
One of the biggest mistakes people make is not cleaning their tools regularly. Dust, dirt, and debris can accumulate on your tools, leading to rust, corrosion, and decreased performance. Make it a habit to clean your tools after each use to remove contaminants and keep them in good working order.
Overlooking lubrication
Proper lubrication is crucial for preserving the functionality of moving parts in your tools. Many DIY enthusiasts forget to lubricate their tools regularly, increasing friction, wear, and damage. Take the time to apply the appropriate lubricant to ensure smooth operation and prevent premature wear.
Using incorrect storage methods
Improper storage can lead to damage and deterioration of your tools. Leaving them exposed to moisture, extreme temperatures, or clutter can result in rust, corrosion, and accidents. Invest in proper storage solutions such as toolboxes, racks, or pegboards to safeguard your tools and keep them organized.
Failure to inspect for damage
Regular inspections are crucial to identify any signs of wear, damage, or malfunction in your tools. Ignoring these issues can lead to more significant problems and compromise safety. Take the time to inspect your tools before and after each use, and address any issues promptly with repairs or replacements.
Ignoring user manuals
Many overlook the importance of reading and following user manuals regarding tool care. These manuals provide valuable information on proper maintenance, lubrication, and storage specific to the tool model. By familiarizing yourself with the instructions provided by the manufacturer, you can avoid preventable mistakes and ensure the longevity of your tools.
By avoiding these common mistakes in DIY tool care, you can prolong the lifespan of your tools and maintain their optimal performance. Remember to clean, lubricate, store, inspect, and follow the manufacturer’s instructions for the best results!
Advantages of DIY Tool Maintenance for the Garage Workshop
Do-it-yourself (DIY) tool maintenance is an essential practice for every garage workshop enthusiast. While it may seem like an additional task, the advantages of regular maintenance and care for your tools far outweigh any inconvenience. By investing time in keeping your tools in optimal condition, you will not only extend their lifespan but also enjoy the following benefits:
Improved Performance
Maintained and well-cared-for tools perform at their best. Regular maintenance ensures your tools remain sharp, clean, and properly lubricated, enabling them to function efficiently. Adequately training your tools allows you to complete projects faster and more efficiently.
Cost Savings
Properly maintained tools are less likely to break or wear out prematurely. By implementing DIY maintenance practices, you can identify and address minor issues before they become costly. Additionally, regular maintenance prevents the need for frequent replacements, saving you money in the long run.
Enhanced Safety
DIY tool maintenance enhances safety by reducing the risk of accidents and injuries. Regularly inspecting your tools allows you to identify and address potential safety hazards, such as damaged cords or dull blades. Properly maintained tools are also less likely to malfunction, ensuring your well-being while using them.
Increased Longevity
You can significantly extend their lifespan by taking the time to care for your tools. DIY maintenance practices, such as cleaning, lubricating, and storing tools properly, help protect them from rust, corrosion, and other forms of damage. This means that your beloved tools will serve you faithfully for many years.
Personal Satisfaction
A sense of pride and accomplishment comes with maintaining your tools. Knowing you are responsible for keeping them in top shape can be rewarding, making you more connected to your tools and craft. DIY tool maintenance is an opportunity to show care and dedication to your workshop.
Overall, DIY tool maintenance is vital to owning and using garage workshop tools. It enhances their performance, ensures safety, saves money, and offers personal satisfaction. Make it a regular part of your workshop routine and reap the many benefits it has to offer.
Conclusion
Properly maintaining and caring for your DIY workshop tools ensures longevity and optimal performance. Following the tips and techniques outlined in this blog post, you can maximize your investment and enjoy seamless projects in your garage workshop.
Remember to clean your tools regularly, removing any dust, debris, or residue that may accumulate over time. This will keep them in good condition and prevent unwanted damage to your projects. Lubricating moving parts and applying rust inhibitors will further protect them from corrosion and ensure smooth operation.
Additionally, storing your tools properly is crucial. Please keep them clean and dry, away from excessive heat, humidity, or direct sunlight. Use protective covers or cases to shield them from potential accidents or impacts while storing or transporting them.
Investing a little time and effort into preventative maintenance will save you from costly repairs or replacements. It’s essential to develop a regular maintenance routine and stick to it. By doing so, you can extend the lifespan of your tools and enjoy a more efficient and enjoyable DIY experience in your garage workshop.
So why wait? Start implementing these tips today and keep your DIY workshop tools in top-notch condition for years.
Frequently Asked Questions (FAQs)
Q: Why is tool maintenance and care necessary for a DIY enthusiast?
A: Tool maintenance and care are crucial for DIY enthusiasts to ensure their tools’ longevity and optimal performance. Regular maintenance helps prevent wear and tear, reduces the risk of accidents, and saves money in the long run.
Q: What are some essential DIY tool maintenance tips?
A: To maintain your DIY tools, clean them after each use, store them in a dry and safe place, regularly inspect for any damage or loose parts, and lubricate moving components. Additionally, follow manufacturer guidelines for specific maintenance instructions.
Q: How often should I clean and lubricate my hand tools?
A: It is recommended to clean your hand tools after every use to remove dirt, debris, and moisture. Lubrication should be done periodically or when you notice any squeaking or stiffness in the tool’s movement.
Q: What kind of cleaning solution should I use for my tools?
A: You can use mild soap and water solution for general cleaning. Avoid using harsh chemicals that may damage the tool’s surface or components. For stubborn dirt or rust, use a rust remover or penetrating oil.
Q: Can I sharpen my tools?
A: Yes, you can sharpen specific hand tools like chisels, knives, or scissors. Use a sharpening stone or honing guide to maintain their sharpness. However, seeking professional sharpening services for more complex tools like saw blades or drill bits might be best.
Q: How do I store my tools properly?
A: Store your tools in a dry, clean, and well-ventilated area. Use tool racks, pegboards, or toolboxes to organize and prevent them from getting damaged or lost. Keep power tools away from moisture and extreme temperatures.